TABLE OF CONTENTS
- I. Manage your customers' orders
- II. Create batches
- III. Upload and assign Land plots to batches
- IV. Manage your uploaded land plots in the land plot view
I. Manage your customers' orders
Via the main menu item "EUDR" >> "Received Orders", you will find a list of all products that your customers have ordered. This is the central view where you can see if there are any newly ordered products you need to provide data for. Each product has to be assigned to at least one batch.
A batch is a certain quantity of a commodity you deliver to your customer over a certain time period. As an EU supplier, you must link a batch with a reference and validation number (due diligence statement) or, as a non-EU supplier, with the underlying land plots and harvest information.
How to assign batches in the "received orders" view
You can assign batches to the ordered products by clicking on "Assign batches" either by selecting the relevant products and clicking the button at the top right (1) or directly by clicking the button in the column “batches” (2).

If batches related to the received orders exist (the batch must have the same HS code as the ordered product(s) to be shown)
1. Select the batch(es).
2. Click on "Assign batches".

If you haven't uploaded the related batches to the products, you need to upload them before you can assign them by proceeding as explained in the next chapter.
II. Create batches
Before you can assign a batch in the "Received Orders" list, you have to create batches.
1. Go to "EUDR" in the main menu.
2. Select "Batches".
![]()

- Click on "Add batch".

Fill out the form
- Enter the “Batch ID”, which serves as a unique identifier.
- Enter the “HS-Code” of the batch (see Annex 1 of the EUDR).
- Enter the trade “Name” of the batch. We recommend a name as meaningful as possible, such as "Coffee summer harvest north Tarrazú".
- Enter the “Quantity” of the batch. This is the batch quantity from which you will supply your customer until the date specified in the field "valid until". (see below)
- Enter the corresponding “Unit” (kg or m3) for the batch. If your company is located outside the EU, the unit must be kg.
- Enter the date "Valid until" to declare how long this data is valid for this batch. This can be, e.g., the next 3 months or until next year, so that future order requests up to this supplied until date will be answered automatically.
- Enter the “DDS reference number” of the EUDR- relevant product if a "Due Diligence statement" has already been created for the batch in scope.
- Enter the “DDS Verification number” of the EUDR-relevant product if a "Due Diligence statement" has already been created for the batch in scope.

- If you want to bulk upload multiple batches, this can be done via "Upload batches".

Check if the batch data is complete:
1: If the "Due Diligence statement" has been attached to the batch, you just need to assign this batch to the ordered products (see I. above), and you are done.
2: If the "Due Diligence statement" hasn't been attached to the batch, the field "Reference number" will be empty in the batch list view on the platform. In this case, you need to assign land plots. This can be easily done, see the upcoming section.
III. Upload and assign land plots to batches
- Click on "Assign".

Option 1: Upload land plots
- Upload your "geodata" in the "GeoJSON" format, add harvest start and end date, and click on "Submit".
- If the commodity of the batch is wood, please add the scientific and common names
-
- The harvest start and end dates are valid for all uploaded land plots
- If a land plot was uploaded before, it will be updated automatically based on its name and coordinates.

OR
- Click on "Draw on map" and click in the top left corner to draw the polygons. Add the appropriate properties and click on "Save" for the platform to save it in the "GeoJSON" format. Add the harvest start and end date and click on "Submit".

Please find more general information about geodata, how to capture and store it in the GeoJSON format, in this article: Capturing and storing geodata
Option 2: Assign pre-uploaded land plot
(You can do this if you've already uploaded data for Land plots to the platform, and you want to manually assign these Land plots to the batches)
- Fill in the required data: select the according land plots, only for wood add common and scientific name, and the harvest date, and click on "Submit".

You can see all uploaded land plots in the land plot list view.
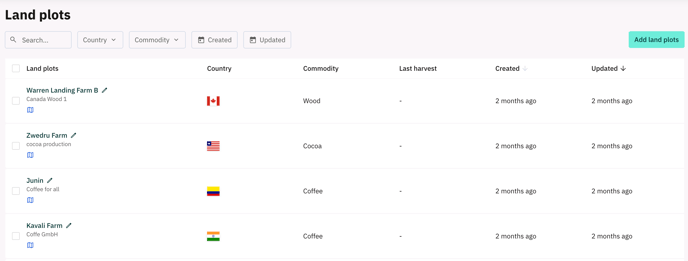
IV. Manage your uploaded land plots in the land plot view
1. Go to "EUDR" in the main menu.
2. Select "Land plots".
3. Now you can delete and edit your Land plots or add new ones.
![]()